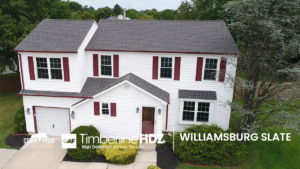
What is a Square in Roofing?
Introduction to Roofing Squares
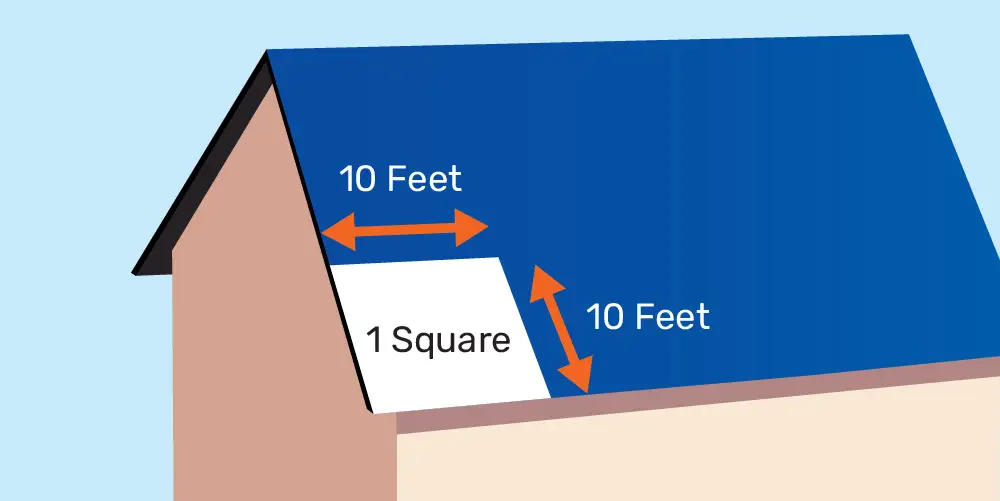
Welcome to the world of roofing squares, where precision meets practicality in the noble art of roofing. A square in roofing, my dear reader, is not a shape but a unit of measurement crucial to the construction and maintenance of roofs. It refers to an area equal to 100 square feet. This fundamental concept is essential in roofing projects, whether for small repairs or complete installations.
Unveiling the Mystery of Roofing Squares: A Comprehensive Guide
The roof, the crowning glory of your home, stands as a guardian against the elements, keeping you and your loved ones safe. But beneath the surface, a world of precise calculations and meticulous planning exists. In this realm, a concept known as the roofing square reigns supreme, playing a crucial role in ensuring a successful roofing project.
Demystifying the Square: What It Is and Why It Matters
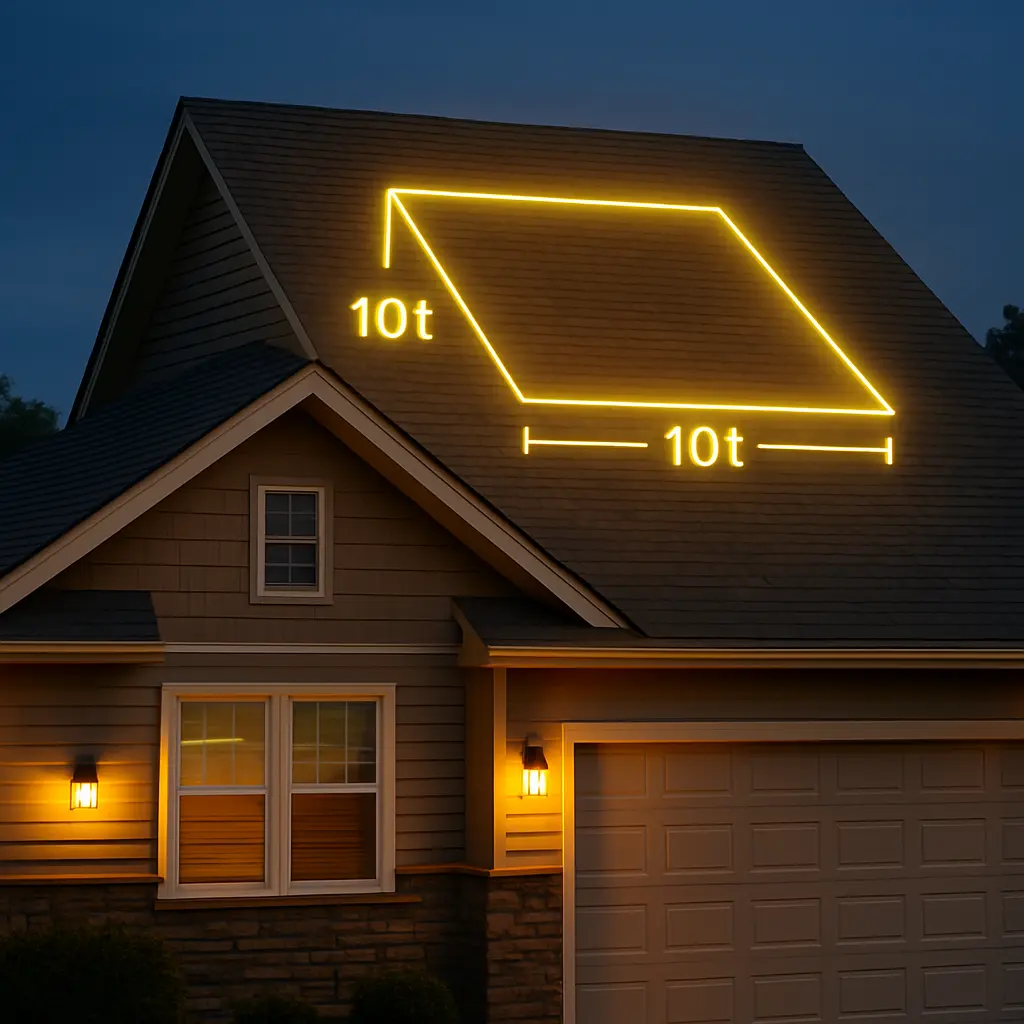
Unlike a geometric square, a roofing square is a unit of measurement specifically designed for the roofing industry. It represents an area of 100 square feet (10ft x 10ft). This standardized unit has become the cornerstone of modern roofing, simplifying communication between contractors, material suppliers, and homeowners.
Defining the Square in Roofing: Its Purpose and Significance
In the realm of roofing, accuracy is king. A misstep in measurements can lead to disastrous outcomes, such as insufficient coverage or wasteful excess. That’s where roofing squares come into play, ensuring that every shingle finds its rightful place atop your home.
The Importance of Accuracy in Roofing
- Ensuring Adequate Coverage: Precise measurements guarantee that every inch of the roof is appropriately covered.
- Economic Efficiency: Accurate calculations help in budgeting, preventing the waste of materials and resources.
- Avoiding Roofing Calamities: Miscalculations can lead to leaks or structural damage.
Understanding Roofing Measurements
Conversion Factors: Squares to Feet and Vice Versa
To convert squares to square feet, multiply by 100. For instance, 15 squares equal 1500 square feet. Conversely, divide the total square footage by 100 to find out the number of squares needed.

Determining the Pitch or Slope of a Roof
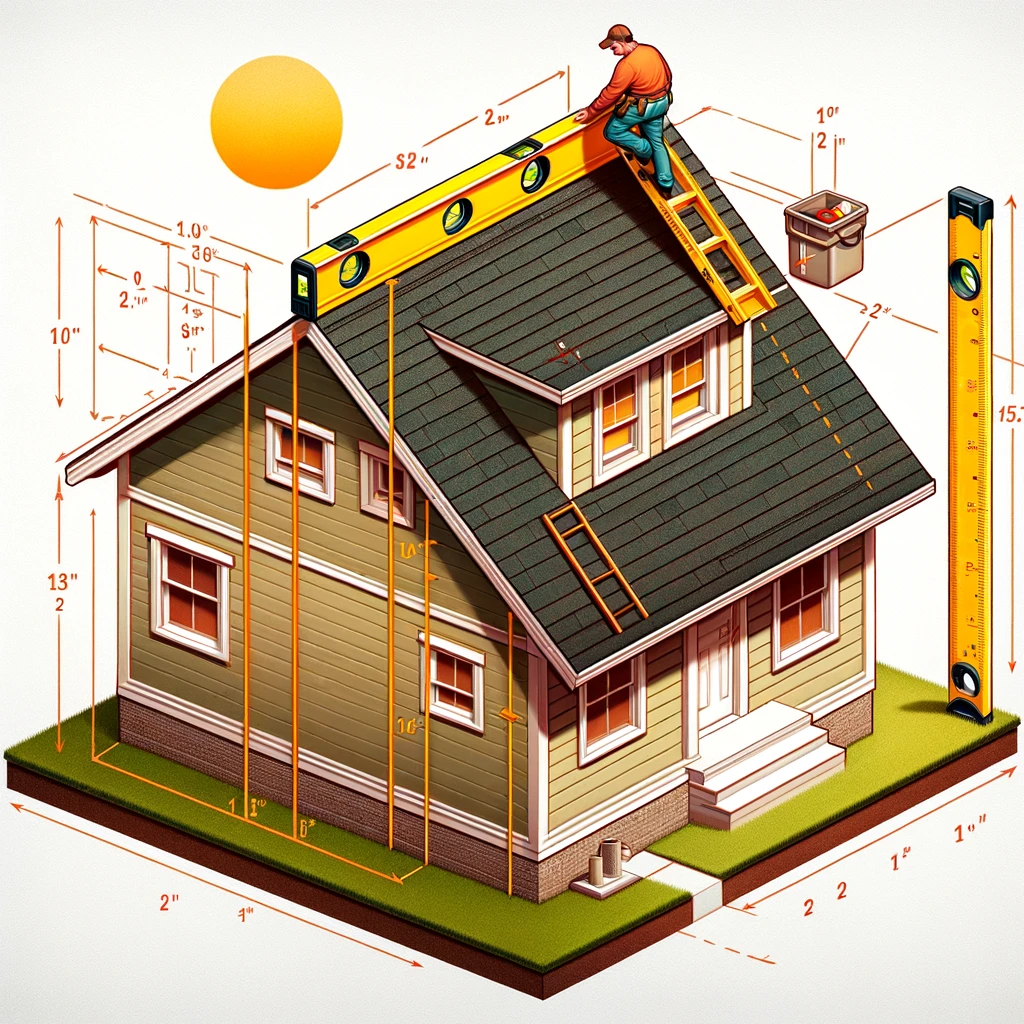
The pitch or slope is a vital factor in roofing, affecting everything from material estimates to structural design. Measure the rise over a 12-inch run to determine the roof’s angle.
Measuring the Length and Width of each Roof Section
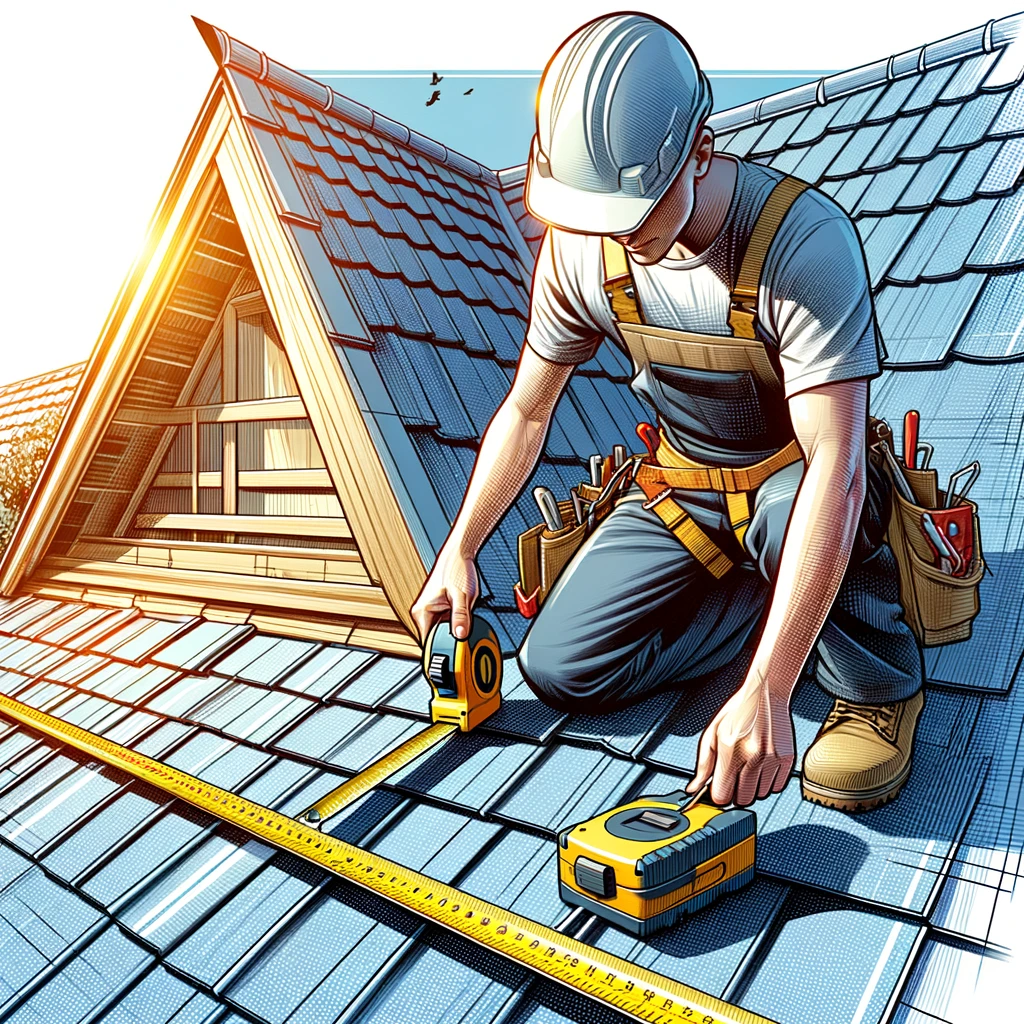
Accurate measurement of each roof section, accounting for overhangs and irregularities, is critical in estimating material needs.

Estimating Material Quantities with Squares
Calculating the Number of Shingles Required per Square
Roofing squares guide the estimation of shingles needed for a project. Manufacturers usually indicate how many bundles are required per square. Add around 10% extra material for waste.
Estimating Underlayment, Flashing, and Other Materials
Besides shingles, underlayment, flashing, and sealants are essential. Each has specific measurement guidelines based on the roof’s design and size.

Pitch and Material Calculations
- Material Estimation: A steeper pitch means more material is needed per square foot of horizontal space. By knowing your pitch, you can use these manufacturer specifications to fine-tune your material estimates.
- Structural Considerations: Roof pitch plays a vital role in determining the structural support required for your roof. Steeper pitches require stronger trusses and rafters to withstand wind and snow loads. Consulting with a structural engineer for complex roof designs is always recommended.

Common Types of Roofs and Their Square Requirements
Gable Roofs: Calculating Squares for Simple Pitched Roofs
For a gable roof, measure the ridge length and hip lengths, accounting for valleys, dormers, and chimney penetrations.
Hip Roofs: Determining Squares for More Complex Designs
Hip roofs require attention to different slopes and angles. Measure each slope and side individually for an accurate estimate.
The Role of Roofing Squares in Roofing Projects
Roofing squares are not just a measurement unit; they’re the cornerstone of roofing planning and execution. Understanding this concept is crucial for homeowners, contractors, and DIY enthusiasts alike. It’s the bridge between abstract design and physical realization.
Why Roof Squares Matter: Beyond the Basics
- Project Planning: They help in visualizing the roof’s size and layout.
- Material Estimates: Crucial for ordering the correct amount of materials.
- Cost Calculation: Provides a basis for estimating the overall project cost.
Navigating Through Roofing Measurements: A Step-by-Step Approach
Accurate Measurements: The Key to Successful Roofing
Identifying Measurement Areas: Divide the roof into measurable sections.
Incorporating Roof Features: Factor in skylights, chimneys, and other elements.
Using the Right Tools: A tape measure, level, and calculator are indispensable.
Dealing with Complex Roof Shapes
Intersecting Gables and Hips: Break them down into simpler geometric shapes for easier calculation.
Valleys and Peaks: Measure these separately as they often require additional materials.
The Significance of Roof Pitch in Roofing Squares
Understanding the pitch is crucial as it affects the quantity of materials needed and the overall design of the roof. A steeper pitch means more surface area and thus more roofing squares.
Calculating Roof Pitch: A Practical Guide
- Using a Level and Measuring Tape: Determine the rise over a 12-inch run.
- Pitch Factor: Apply this to adjust material estimates based on roof steepness.
Roofing Materials and Roofing Squares: A Detailed Look
Now that you’ve mastered the art of measuring and factoring in the pitch, it’s time to translate squares into materials. Here’s a breakdown of the key roofing materials and how to estimate them using squares:
Shingles
The most common roofing material, asphalt shingles typically come in bundles covering a specific area (e.g., one-third of a square). Roofing square requirements will vary depending on the shingle size and type. Always factor in a 10-15% waste allowance for cutting and fitting.
Underlayment
This waterproof layer protects your roof deck from the elements. Underlayment typically comes in rolls covering a specific area. The number of rolls needed will depend on the square footage of your roof and the recommended overlap for your chosen underlayment material.
Flashing
Thin sheets of metal used to seal around roof valleys, chimneys, and other penetrations. Flashing is measured linearly by the foot and comes in various widths. Measure the total length needed for each flashing type and add a 10% allowance for cuts and overlaps.
Estimating Materials: An Art and Science
The Rule of Thumb for Shingle Estimation
Standard Coverage: One bundle typically covers 1/3 of a square.
Waste Factor: Always add 10-15% for cutting and fitting waste.
Underlayment and Flashing: Calculating the Extras
Roll Coverage: Know how much area a roll of underlayment or flashing covers.
Extra for Overlaps and Joints: Additional material is needed for overlaps.
Advanced Roofing Calculations: For the Mathematically Inclined
Delving into Detailed Measurements
- Advanced Geometry: Calculating areas for irregular shapes.
- Trigonometry in Roofing: Used for calculating angles and lengths on complex roofs.
Case Studies: Putting Theory into Practice
Let’s see how roofing squares come to life in real-world scenarios:
The Diligent DIYer
John decides to tackle his shed roof replacement. By measuring the length and width of the single pitched roof section and factoring in the overhang, he calculates the square footage. Knowing the shed has a simple pitch and asphalt shingles are recommended at 3 bundles per square with a 10% waste factor, John can accurately estimate the number of shingle bundles needed to complete the project.
The Savvy Contractor
Sarah, a roofing contractor, is bidding on a complex hip roof project. She meticulously measures each section of the roof, taking into account hips, valleys, and a skylight. Using her knowledge of pitch and manufacturer specifications, Sarah calculates the total number of squares required for shingles, underlayment, and various flashing materials. This precise calculation allows her to provide an accurate quote to the homeowner.
DIY Roofing and Professional Services: A Comparative Analysis
Pros and Cons of DIY Roofing
- Cost Savings vs. Time Investment: DIY can be cheaper but more time-consuming.
- Skill Level: Complex roofs might require professional expertise.
The Value of Professional Roofing Services
- Expertise and Experience: Professionals bring knowledge and skill.
- Warranty and Reliability: Often come with guarantees for workmanship and materials.
Choosing the Right Materials: A Roofing Square Perspective
Factors Influencing Material Choice
- Climate and Environment: Weather conditions dictate suitable materials.
- Aesthetic Preferences: Material choice impacts the roof’s appearance.
- Budget Constraints: Cost per square varies widely among different materials.
Popular Roofing Materials and Their Square Coverage
- Asphalt Shingles: A cost-effective and popular choice.
- Metal Roofing: Durable with different styles and colors.
- Tile and Slate: High-end options for distinctive looks.
Roofing Squares and Environmental Sustainability
Eco-Friendly Roofing Choices
Recycled Materials: Shingles made from recycled content.
Energy Efficiency: Reflective materials that reduce cooling costs.
Balancing Cost and Sustainability
Long-Term Savings: Durable materials can be more cost-effective over time.
Environmental Impact: Consider the production and disposal impact of materials.
Roofing Squares in the Digital Age: Technology and Roofing
Digital Tools and Software
Roofing Calculators Online: Simplify calculations and estimates.
3D Modeling Software: For visualizing and planning complex roofs.
Future Trends in Roofing
Innovations and Developments
Sustainable Materials: Advances in eco-friendly roofing options.
Smart Roofing Technology: Integration of technology for energy generation and monitoring.
The Roofing Square: A Partner in Roofing Success
Whether you’re a homeowner embarking on a DIY project or a seasoned roofing professional, understanding roofing squares is an invaluable asset. By demystifying this essential unit and mastering the art of measurement, you can ensure your roof is not only beautiful but also functional and long-lasting. After all, a roof built on a foundation of accurate calculations is a roof built to stand the test of time.
The Future of Roofing: Sustainable Solutions and Technological Advancements
The world of roofing is constantly evolving. Sustainable materials like recycled composite shingles and metal roofs with high solar reflectance are gaining traction. Technology is also playing an increasingly important role, with 3D modeling software and roofing drones improving design, estimation, and installation efficiency.
As these advancements unfold, one thing remains constant: the importance of the roofing square. This ingenious unit will continue to be the cornerstone of accurate roofing project planning and execution, ensuring our homes and buildings remain protected for generations to come.
Deep Dive: Delving into Advanced Roofing Square Calculations
We’ve established the fundamentals of measuring your roof and translating those measurements into roofing squares. But for the truly curious, or those tackling complex roof projects, there’s a whole new level of calculation to explore.
Geometric Shapes and the Art of Breakdown:
Not all roofs are neat rectangles. Complexities like intersecting gables, hips, valleys, and skylights require a bit more finesse. Here’s where your knowledge of geometry comes in handy. Break down these intricate features into simpler shapes you can easily calculate the area of, such as triangles, trapezoids, and rectangles.
Intersecting Gables and Hips
Imagine a roof with intersecting gables or hips. By visualizing each intersecting plane as a separate triangle or rectangle, you can calculate its area using the familiar formula: Area = base x height (for triangles) or Area = length x width (for rectangles). Sum the areas of these individual shapes to determine the total area of the complex section.
Valleys and Peaks
Valleys, where two roof sections meet inwards, and peaks, the highest points on the roof, require special attention. Valleys often necessitate additional underlayment and flashing for waterproofing. For valleys, you can calculate the area of the triangular valley section itself using the base and height formula. Peaks, typically ridges, are usually narrow and can be incorporated into the overall length measurements of adjoining slopes.
Trigonometry: Your Ally in Roof Pitch Calculations
While the rise-over-run method provides a basic understanding of pitch, trigonometry unlocks a more precise way to calculate angles and lengths on complex roofs. Here are some trigonometric functions that can be helpful:
Tangent (tan):
This function relates the opposite side (rise) to the adjacent side (horizontal run) of a right triangle. Knowing the rise and run of your roof pitch, you can use the tangent function to calculate the angle in degrees.
Sine (sin):
This function relates the opposite side (rise) to the hypotenuse (total roof slope length) of a right triangle. With the pitch angle and desired rafter length, you can use the sine function to determine the required vertical rise of the rafter.
Software Solutions: Streamlining Complex Calculations
For those less comfortable with advanced mathematical formulas, there are a variety of software solutions available to simplify complex roof calculations. Roofing calculators can be found online, allowing you to input your measurements and receive estimates for square footage and material needs. 3D modeling software takes it a step further, enabling you to create a virtual model of your roof. This allows for visualization of the design, identification of potential problem areas, and generation of accurate material estimates.
Remember: While these tools can be valuable aids, a solid understanding of the underlying concepts behind roofing squares and pitch calculations remains essential. It empowers you to interpret software outputs and make informed decisions throughout the roofing project.
Choosing the Right Materials for Your Roof:
Now that you’ve mastered the art of measurement and calculation, it’s time to consider the materials that will cover your roof. Several factors influence material selection, including:
Climate and Environment:
Local weather conditions play a crucial role. For areas with heavy snowfall, metal roofs with high snow-shedding capabilities might be preferable. Conversely, hot and sunny climates might benefit from reflective metal roofs that reduce heat absorption.
Aesthetic Preferences:
The material you choose significantly impacts the overall look of your home. Asphalt shingles offer a wide range of colors and styles, while metal roofs provide a sleek, modern aesthetic. Consider the architectural style of your home when making your choice.
Budget Constraints:
Roofing materials vary significantly in cost per square. Asphalt shingles are generally the most affordable option, while metal roofs and high-end materials like slate or tile come with a higher price tag.
Sustainable Roofing: A Responsibility for the Future
As environmental consciousness grows, sustainable roofing options are gaining traction. Here are some ways to incorporate sustainability into your roof project:
- Recycled Materials: Shingles made from recycled content offer a more eco-friendly alternative to traditional options. Look for roofing materials with high recycled content percentages to minimize environmental impact.
- Energy Efficiency: Certain roofing materials, like metal roofs with high solar reflectance, can help reduce cooling costs in hot climates. By reflecting sunlight, these materials decrease heat absorption in your attic, leading to lower energy consumption.
Roofing Questions & Answers
Installing metal roofing involves several steps including measuring the roof, ordering materials, removing old roofing (if necessary), installing underlayment, and then laying the metal panels. It’s important to follow the manufacturer’s instructions for specific installation procedures and to ensure that the roof has proper ventilation.
In roofing, a square is a unit used to measure the surface area of roofs. One roofing square is equivalent to 100 square feet. For example, a roof that is 2500 square feet has 25 squares.
A roofing square is the same as a square in roofing. It’s a unit of measurement representing 100 square feet. It’s used in the roofing industry to streamline communication and calculation for the materials needed.
The cost of metal roofing varies depending on factors such as material type, profile, and region. On average, it can range from $5 to $14 per square foot including installation. This makes it more expensive compared to asphalt shingles, but it tends to last much longer.
TPO stands for Thermoplastic Olefin, which is a single-ply roofing membrane that is used mainly on flat roofs. TPO is known for its durability, energy efficiency, and ease of installation.
Metal roofing can be cut using various tools like tin snips, a circular saw with a metal cutting blade, or a nibbler. It’s important to measure and mark the cutting lines accurately and to wear protective gear.
The cost of roofing depends on various factors including material, size of the roof, location, and labor costs. On average, for asphalt shingles, it can range from $3.50 to $5.50 per square foot, including installation.
To install roofing shingles, first prepare the roof by installing drip edges and underlayment. Start laying the shingles from the bottom edge of the roof and work your way up, making sure to follow the manufacturer’s instructions for nailing and overlapping the shingles.
To install metal roofing over shingles, you should first check local building codes. If allowed, begin by installing furring strips over the existing shingles to create an even surface. Then, install an underlayment over the furring strips, followed by the metal roofing panels.
A roofing square is equal to 100 square feet.
EPDM stands for Ethylene Propylene Diene Monomer. It is a type of synthetic rubber roofing membrane used primarily on low-sloping roofs. It is known for its durability and cost-effectiveness.
Starting a roofing company involves several steps including conducting market research, creating a business plan, registering your business, obtaining necessary permits and licenses, getting insurance, purchasing equipment, and marketing your services.
Composition roofing typically refers to asphalt shingles which are made from a fiberglass or felt paper base coated with a waterproof asphalt layer and topped with ceramic granules.
The best underlayment for roofing dependson the type of roofing material and the climate in which it is being installed. Synthetic underlayment is generally considered durable and effective for various types of roofing materials. For metal roofing, a non-perforated, synthetic underlayment is often recommended.
Rolled roofing is a mineral-surfaced roofing material that comes in rolls. It is typically used for low-slope roofs and is less durable than other roofing materials, but also less expensive.
The best shingles for roofing depend on factors like climate, budget, and aesthetic preferences. Architectural asphalt shingles are popular for their balance between cost and durability. In areas with high winds or heavy snowfall, metal or slate might be a better option.
The cost of a square of roofing varies depending on the material. For asphalt shingles, it might range from $90 to $100 per square for materials alone. For metal roofing, it might be between $300 and $700 per square for materials.
Installing metal roofing on a shed is similar to installing it on a house. Measure the shed roof, order the materials, remove old roofing if necessary, and install an underlayment. Next, install the metal roofing panels, starting from the bottom edge of the roof and working your way up.
Overlapping metal roofing involves laying the panels so that the edge of one panel overlaps the edge of the adjacent panel. The amount of overlap depends on the roofing manufacturer’s instructions, but it is typically around one to two inches.
Membrane roofing refers to roofing systems made of large, flexible sheets of synthetic materials like TPO, EPDM, or PVC. These membranes are used primarily on flat or low-slope roofs to prevent water leakage.
Metal roofing can be purchased at home improvement stores, roofing supply companies, or through online retailers. It is also possible to order directly from manufacturers.
Slate roofing is made from natural stone and is known for its durability and natural appearance. It is one of the most durable roofing materials, but it is also among the most expensive.
Re-roofing a house involves removing the old roofing materials, inspecting and repairing the underlying structure, installing underlayment, and then installing new roofing materials.
To calculate roofing squares, measure the length and width of each section of the roof, multiply them to get the area, and then add the areas together to get the total square footage. Divide the total square footage by 100 to convert it to roofing squares.
Roofing shingles can be made from various materials including asphalt (most common), wood, metal, plastic, slate, or composite materials.
The number of roofing nails per square depends on the type of shingles and the manufacturer’s recommendations. On average, you will need approximately 320 to 400 nails per square for standard three-tab shingles.
Typically, there are three bundles of standard three-tab asphalt shingles in a roofing square.
In roofing, TPO stands for Thermoplastic Olefin. It is a single-ply roofing membrane that is used primarily on flat or low-sloping roofs.
Installing rubber roofing usually involves cleaning the roof surface, rolling out the rubber material, and then adhering it either with glue or mechanically fastening it. Make sure to overlap edges and seal seams to prevent leaks.
Composite roofing refers to roofing materials made from a mixture of various substances, usually including recycled materials, asphalt, and fiberglass. Composite shingles are designed to resemble traditional materials such as wood or slate, but with enhanced durability and often at a lower cost.
Metal roofing panels come in various widths. Common widths for corrugated panels are 26 or 36 inches wide. Standing seam metal roofing typically comes in widths of 12, 16, or 20 inches.
Built-up roofing, commonly known as BUR, is a type of roofing used on low-slope or flat roofs. It consists of alternating layers of roofing felt and waterproof material, usually asphalt, and is often topped with a layer of gravel.
Synthetic underlayment is generally considered the best option for most roofing types due to its durability and water resistance. However, the best choice can depend on the roofing material and the climate in which it is being installed.
The cost of roofing shingles varies based on the type and quality. On average, asphalt shingles cost between $90 and $100 per square (100 square feet) for materials alone. Other types like wood, metal, or slate will have different costs.
Tin roofing, which is usually actually steel coated with tin, generally costs between $3 and $15 per square foot, depending on factors such as the profile, thickness, and finish.
Cutting tin roofing can be done using tin snips for small cuts or a circular saw with a metal-cutting blade for larger cuts. It’s important to wear protective gear and ensure that the cuts are measured and marked accurately.
There are 100 square feet in a roofing square.
The cost of a square in roofing depends on the material. For asphalt shingles, it typically ranges from $90 to $100 for materials alone. For metal roofing, it can be between $300 and $700 for materials.
Architectural asphalt shingles are often considered the best for general use due to their balance of cost, durability, and appearance. However, in certain climates or for specific aesthetic preferences, materials like metal, slate, or wood may be preferred.
To put on roofing shingles, start by installing the underlayment and drip edge. Begin laying the shingles from the bottom edge of the roof and work upward. Use roofing nails to secure the shingles, following the manufacturer’s instructions for placement and spacing.

